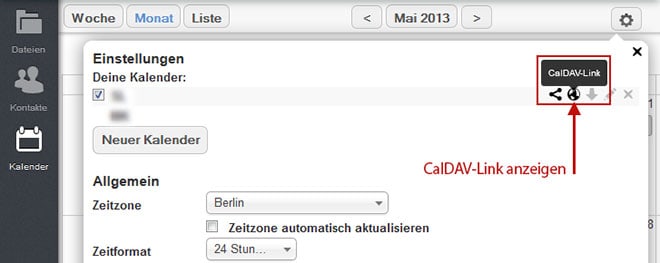
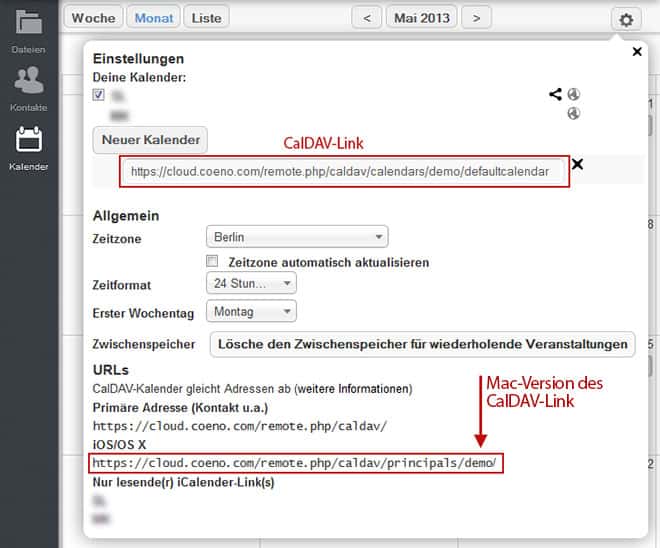
For the synchronization of calendar events, ownCloud provides a CalDAV interface. But this sounds much more complicated than it really is in the end, because all you need is a suitable calendar program and a corresponding URL, which we get from ownCloud. After logging in to the ownCloud browser interface, you switch to the calendar overview and open the calendar settings by clicking on the cogwheel icon in the upper right corner. In addition to basic settings (time format, time zone, etc.), which can be made here, you will get an overview of all your own calendars as well as the shared calendars of other ownCloud users. By clicking on the world icon, you can make the ownCloud calendar show the link to this calendar.
iPhone Calendar
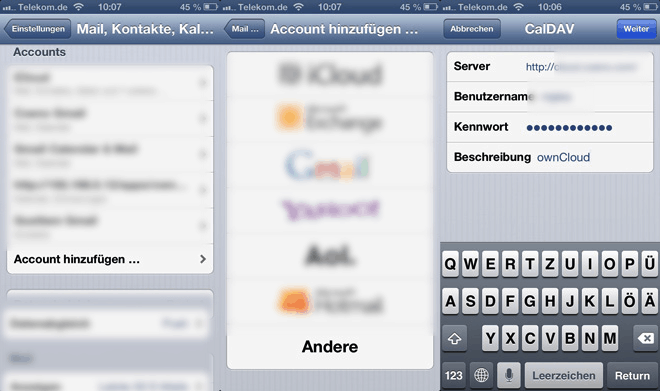
The iPhone offers native support for CalDAV calendars. To set it up on the iPhone, open the "Settings" app, select "Mail, Contacts, Calendar" and then "Add Account". On the following screen select "Other" and then "Add CalDAV Account". Now you only have to enter the ownCloud calendar URL for iOS/OS X (see above) as well as the ownCloud username and password under "Server" and save the configuration. After setup, the ownCloud calendars are available in every calendar app that uses the iPhone's internal calendar management, which should be just about all of them.
OS X Calendar
In OS X (10.8), the ownCloud calendar is also set up centrally, similar to the iPhone. To do this, open the "System Preferences" in OS X and select the item "Mail, Contacts, Calendar". In the following view select "Add another account" from the list on the right and then select "Add CalDAV account". Now enter the ownCloud calendar URL for iOS/OS X (see above), the ownCloud username and password and confirm with "Create".
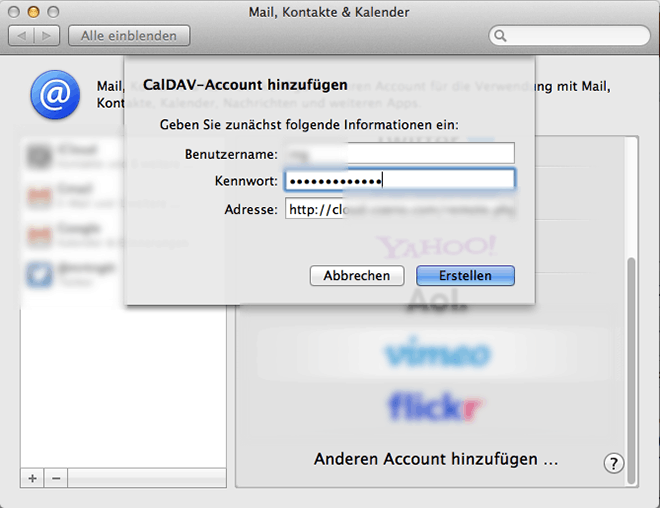
The calendar is now created and is available in the OS X Calendar application and all other calendar applications that use the OS X calendar management.
Android
If you want to synchronize your ownCloud calendar with your Android device, you need an additional paid app (e.g. CardDAV-Sync beta), which integrates this task under Settings > Menu & Accounts. You can create a new calendar under Settings > Menu & Accounts. All you need to do is enter the ownCloud calendar URL (see above) and enter your ownCloud username and password. Then you can select your ownCloud calendars to be synchronized. As well as further settings, e.g. frequency of synchronization. After confirming, the calendar events appear in the Android calendar.
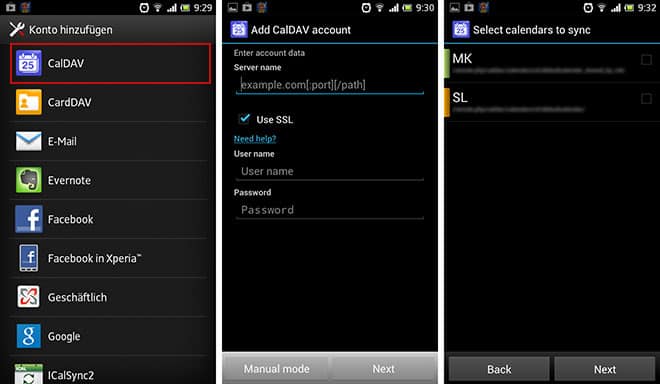
Thunderbird/Lightning
In Thunderbird the Lightning-AddOn provides a useful calendar solution. Here you can also integrate your ownCloud calendar quite easily. To do this you have to go to Settings > New Message > Calendar and tell the Lightning-AddOn to create a new calendar.
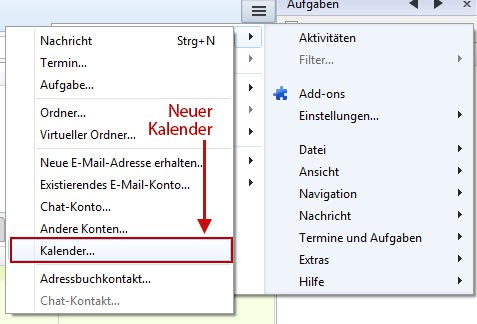
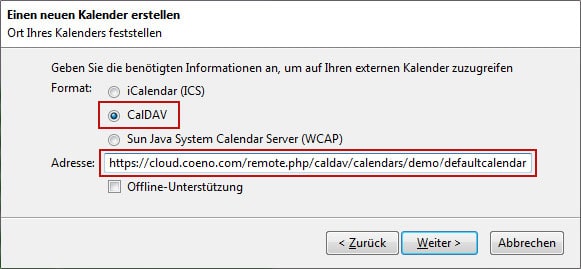
Then select "In network" in the following dialog, because we want to synchronize an online calendar. In the next view you have to select the CalDAV format and enter the ownCloud calendar URL (see above) in the address field.
Finally, you can give the calendar a name, assign an individual color and link an e-mail address. You have to repeat this procedure for each ownCloud calendar that you want to synchronize with Lightning.




.jpeg)


